Happy New Year to everyone! Hard to believe I have been blogging now for almost a full year! My first post was on 1/9/13. Looking forward to many more posts in 2014. Going home, it was really nice to hear the feedback about the blog - so you are reading it, that's good to know!! Today, am sitting here watching the Rose Parade, one of my favorite parades of the year...more so than the Thanksgiving Day parade. To think that all the floats are covered only with natural materials! And, wow, a band from my hometown just walked by on my TV screen - good job McQueen Lancers from Reno, NV (not my high school, but a good one, nonetheless).
Of course with the new year, there comes New Year's Resolutions. Mine are usually the same - lost weight, get in shape, etc. Something I did start last year and will continue will be to be more mindful of where my food comes from, as well as limit, as much as possible, food that is processed or has unnecessary chemical additives. Of course, that means more cooking of raw ingredients!
I recently started reading a book called Cooked by Michael Pollan. It's very interesting - he has 4 main parts that go along with the 4 elements - fire, water, air and earth. In each he learns to cook using this element, so in fire he learned how to slow cook Southern barbecue and whole hogs, in water he learned to braise, in air he learned to make bread and in earth he learns about fermentation. I'm currently in the Air chapter. The way he describes making bread was so evocative that I just had to try it myself. He made his own sourdough starter, which can take a while to start up and I fully plan on doing this in in future, but after waking up out of a dead sleep in panic yesterday morning and not being able to get back to sleep, I remembered seeing a recipe that sounded similar to the one Michael was describing but used regular yeast. So at 5am I trooped down to the kitchen to see where I put my yeast. The interesting thing about bread is that you don't really need a lot of ingredients - yeast, salt, flour, water - the key is time. The thing that interested me about this kind of "artisan" bread is that there is a long fermentation time - 8-12 hours and even overnight. The recipe I used comes from The Kitchn and is called No-Knead Bread. The idea is that you allow the time for the yeast to break down the sugars in the flour and make gluten without kneading it to a pulp. The dough also has a lot of water in it so it is very sticky and would not be something easy to knead.
So I went to find my yeast and came across some that I had put in storage from when I lived in Tucson.
It's only 2 years past the expiration date...the recipe only called for 3/4 tsp and a packet has 2 1/4 tsp, so I added the whole package...you do what you can with what you have!
So first things first, add the flour (regular all purpose flour), yeast and salt in a bowl. You are supposed to stir this up before you add the water, but I forgot to do that. You also need to have warm water - about body temperature.
Incorporate the water until your dough is a sticky mass. Then cover with plastic and a towel and find a warm corner in your kitchen to park the bowl for the day. I put mine on top of the radiator. My kitchen tends to be on the cold side, so I thought that would be the best place. I was a little concerned that it might be too hot in that spot so took the temp (you want it to be about 70). I ended up putting a little insulation between the radiator and the bowl and that seemed to be the ticket.
All day I was a little worried that the cats would investigate and I would end up with dough on my floor, but thankfully that worry was for nothing! This is what the dough looks like after fermenting for about 12 hours. You take the dough out of the bowl onto an oiled cutting board and fold it over, at least once. I didn't have such a great day so I kinda worked out my aggression on the dough.
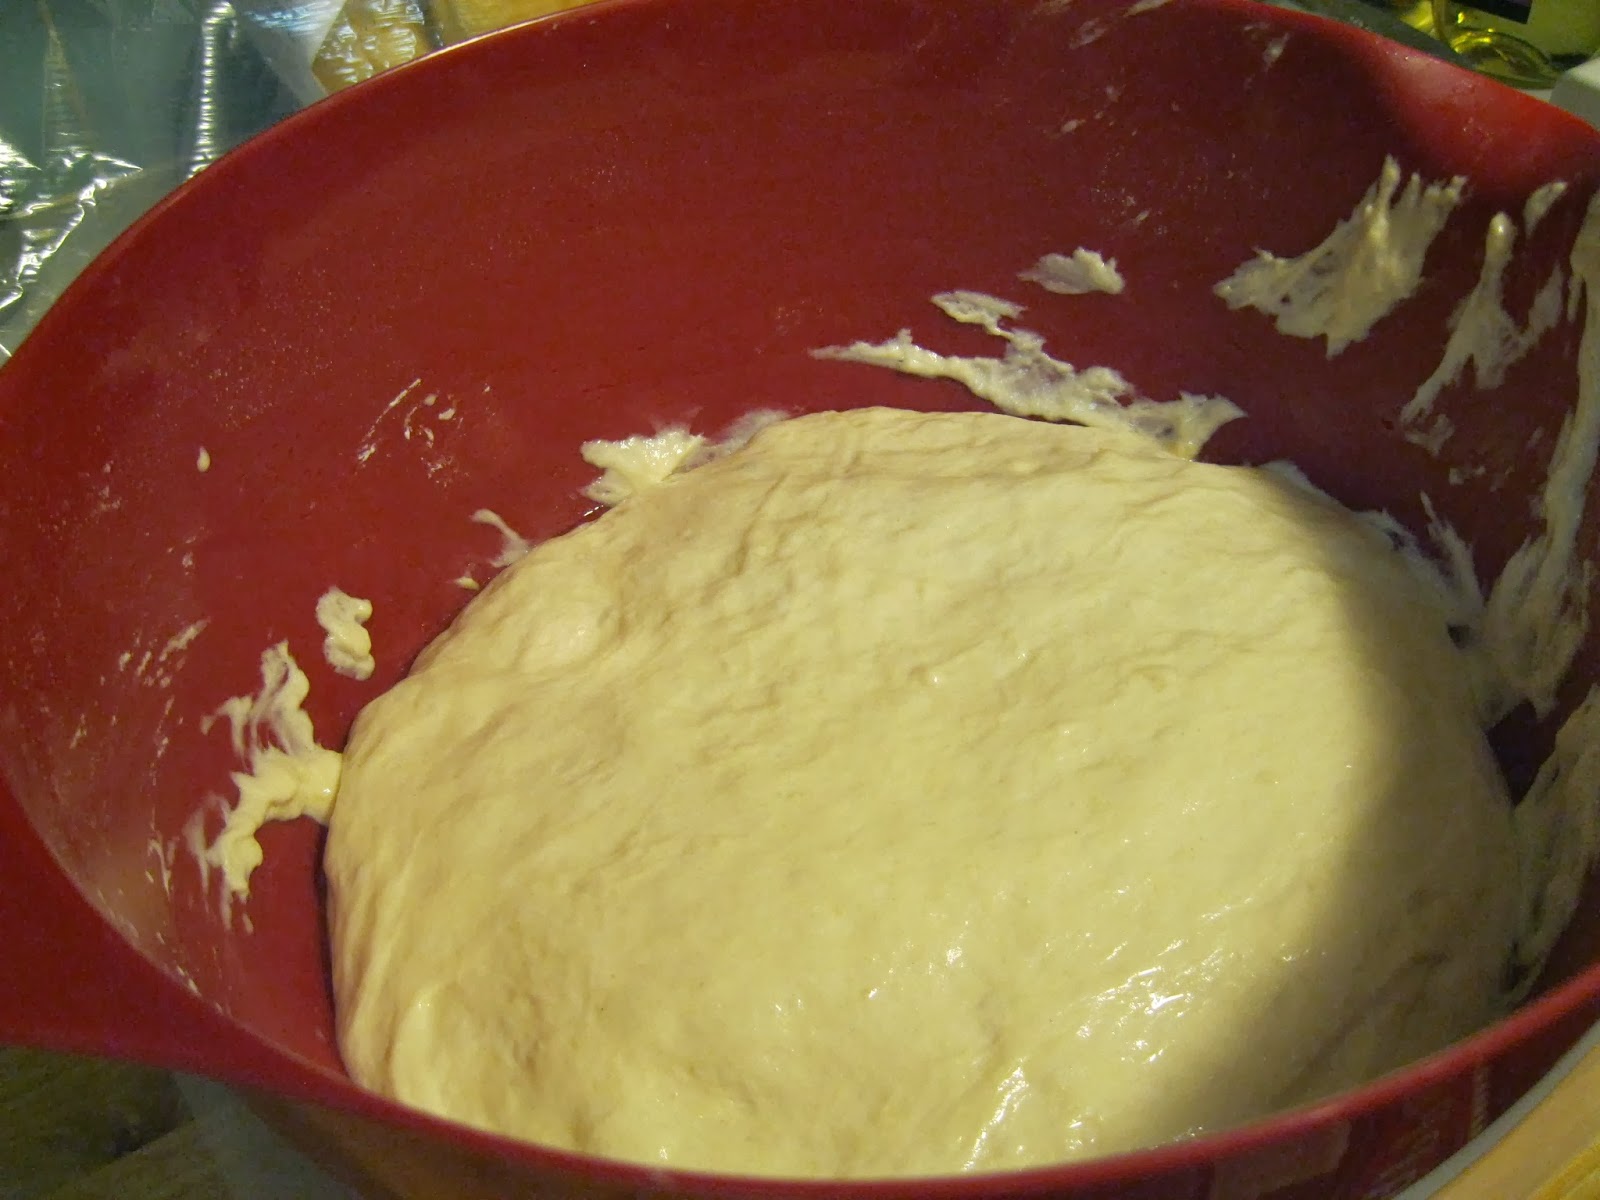
Then put back in your bowl, cover with plastic and let rise again for 1 hour. When there is 20 min left of your hour, put a covered dutch oven in your cold oven and set to 450 degrees. Let both come up to temperature. Take dough and attempt to form into a ball (yeah, that didn't happen for me, but I tried) and put in the dutch oven, cover and cook for 30 min. Then uncover and cook an additional 15 min. You will know the bread is done with a thermometer at 220 degrees.
Look at that!! Pretty much fool proof - old yeast, didn't fully stir the salt in...
Of course I had a hard time letting the bread cool long enough before I had to try it. Look at that texture - Michael Pollan calls this a "crumb shot". By using the dutch oven, you are mimicking a commercial steam oven that allows for a nice crispy crust. It was very tasty bread, but you know, white bread. I think the texture was more interesting than the taste. Some of the comments at the end of the recipe alluded to this as well. I think the bread did as much as it could with the ingredients it had, but this has made me want to investigate a sourdough starter and whole wheat options.
Today, I decided to make a BLT panzanella salad with my bread. A panzanella is an Italian bread salad. This is a way to use stale bread as it softens up with the addition of salad dressing. I first looked to Alton Brown and his TBL Panzanella recipe for inspiration. His recipe is more tomato-centric (notice that the letters are changed around for this reason) and I didn't have that many. Another thing that I liked was that you use some of the bacon drippings to "fry" the bread. Of course, the recipe calls for bread that has been sitting out over night. I ended up putting my bread in a plastic bag (sacrilege, I know) but that actually softened the exterior some. I cooked my bacon in the oven, as described in this blog post. Then poured off the grease and used what was left to coat my bread cubes and put that in the oven - the oven was already hot and the pan was already dirty, why should I make more dishes for myself??
I added some Italian Seasoning and put it in a 350 degree oven for 10 min, stirring half way through. Then it was a matter of halving the cherry tomatoes, chopping up the bacon and adding the greens. I didn't use the dressing in Alton's recipe, though it would be good. I had some dressing on hand from a kale salad that I have been enjoying. This is a lemon forward, Caesar type dressing, super yummy.
Yum, yum, yum. Looking forward to a healthy, happy and tasty New Year.
This started as a way to follow the progress of a batch of Limoncello, now it's morphed into a food blog...
Wednesday, January 1, 2014
Sunday, December 29, 2013
Home for Christmas
It was so nice to be home for Christmas. Being on the other side of the county for most of the year makes seeing family all that more special when I do. That being said, it was a whirlwind of a trip.
My sister and I happen to be two of those lucky people that have a birthday during the holiday season (December 30th, for me; 12/18 for her). So we all went out to dinner for our birthdays - and brought wine. Notice the date on that bottle? It's 1984 - the year I was born. My parents bought 2 cases of wine to be served at my rehearsal dinner for my wedding (a tradition my grandfather started by making wine the year each of his daughters were born for their weddings). My mom was 19 when she got married, this year I'll be 29 - good thing the wine was stored correctly!! Since I turned 21, we have been breaking out the wine every year on my birthday, just to make sure it's still good (of course). This was sooo yummy! Still good!
Another Christmas tradition in my family are a drink called Tom and Jerrys. This is basically eggnog on steroids. It consists of brandy and rum, topped with whipped eggs (the whites and yolks are whipped separately with sugar and then folded together), hot milk and nutmeg. It's an old German tradition to make these drinks. My mom tells a great story that every year, on Christmas Eve, the men would claim that they had to stay home from church to whip the eggs for the batter (since it had to be done by hand). So the women and children went to church and by the time they got back, the batter was whipped but so were all the guys! Totally schnockered. We usually serve them for our annual holiday church party and our philosophy is you get one once a year, whether you need it or not!
This is a pear coffee cake my mom made for dessert the first night I was back. She taught me to cook and I get my cooking ways from her. When we had it for dessert, she also made poached pears and a pear sauce. This was because she happened to be a Costco and got her pears there...this is so totally something I would do!! It was delicious as dessert and great for breakfast the next day. This recipe was in the most recent issue of Food and Wine magazine. I'm not sure what all was in the sauce, but it was awesome!
Here's a yule log my aunt made for Christmas Eve dinner. German chocolate theme - chocolate and coconut.
This is our Christmas Eve drink - Aperol Gin Punch. It packed a punch, that's for sure! It had Yellow Chartreuse in it - not something I've had before. It's from France and has a proprietary recipe. When we tasted it straight, it was herby with an anise forward flavor. On the sweeter side, would be great with tonic (then, I think everything would taste good with tonic). And, it claims to be the only liquor that a color is named after it.
This is my mom's dog, Romeo. She bought him a knight to ride him as one of his Christmas presents. He was happier with his new squeaky ball, I think.
What a great trip home! But I now need a vacation from my vacation...
My sister and I happen to be two of those lucky people that have a birthday during the holiday season (December 30th, for me; 12/18 for her). So we all went out to dinner for our birthdays - and brought wine. Notice the date on that bottle? It's 1984 - the year I was born. My parents bought 2 cases of wine to be served at my rehearsal dinner for my wedding (a tradition my grandfather started by making wine the year each of his daughters were born for their weddings). My mom was 19 when she got married, this year I'll be 29 - good thing the wine was stored correctly!! Since I turned 21, we have been breaking out the wine every year on my birthday, just to make sure it's still good (of course). This was sooo yummy! Still good!
Another Christmas tradition in my family are a drink called Tom and Jerrys. This is basically eggnog on steroids. It consists of brandy and rum, topped with whipped eggs (the whites and yolks are whipped separately with sugar and then folded together), hot milk and nutmeg. It's an old German tradition to make these drinks. My mom tells a great story that every year, on Christmas Eve, the men would claim that they had to stay home from church to whip the eggs for the batter (since it had to be done by hand). So the women and children went to church and by the time they got back, the batter was whipped but so were all the guys! Totally schnockered. We usually serve them for our annual holiday church party and our philosophy is you get one once a year, whether you need it or not!
This is a pear coffee cake my mom made for dessert the first night I was back. She taught me to cook and I get my cooking ways from her. When we had it for dessert, she also made poached pears and a pear sauce. This was because she happened to be a Costco and got her pears there...this is so totally something I would do!! It was delicious as dessert and great for breakfast the next day. This recipe was in the most recent issue of Food and Wine magazine. I'm not sure what all was in the sauce, but it was awesome!
Here's a yule log my aunt made for Christmas Eve dinner. German chocolate theme - chocolate and coconut.
This is our Christmas Eve drink - Aperol Gin Punch. It packed a punch, that's for sure! It had Yellow Chartreuse in it - not something I've had before. It's from France and has a proprietary recipe. When we tasted it straight, it was herby with an anise forward flavor. On the sweeter side, would be great with tonic (then, I think everything would taste good with tonic). And, it claims to be the only liquor that a color is named after it.
This is my mom's dog, Romeo. She bought him a knight to ride him as one of his Christmas presents. He was happier with his new squeaky ball, I think.
What a great trip home! But I now need a vacation from my vacation...
Christmas Candy Making
It was soo nice to be home!! The trip was too short, as always, but it was jam packed! I come from a family of cooks, so of course, we cooked when I was home. My Aunt recently moved to Reno to be with my mom and my grandma, so this year, she decided we should make candy. Everyone has ways they get into the holiday spirit, usually I make cookies - but being so far from family, it's somewhat hard to get in the mood to make them. Also, I really don't know much about candy making, so I was excited. One of the things my mom and I were interested in was making fondant - you know, that stuff that covers fancy cakes? Apparently it also is the covering for chocolate covered cherries and the center of peppermint patties. Well it starts out like this:
Cook sugar, butter and corn syrup until soft ball stage. Pour onto a buttered sheet pan to cool.
Once the sugar is cool enough to the touch, it needs to be worked....a lot. Through agitation and mixing of air, there is a chemical reaction where the sugar crystallizes from a gooey mess to an opaque, mold-able candy. You can feel it happening - it turns really hot all of a sudden - so an exothermic reaction.
Next, on to make those chocolate covered cherries. First you start with a mess of maraschino cherries.
Then you cover each cherry with some fondant. You have to make sure that you cover the whole cherry, to seal in the juices.
Let the fondant on the cherries dry - or lose the tackiness.
While we were waiting for the cherries to dry, we made peppermint patties with the other batch of fondant.
Once everything is dry, it's time to dip in chocolate! With the cherries, make sure you cover the stem up a good way to seal in all the juices.
A tray of finished cherries. So I was not aware that the cream the surrounds the cherry starts as fondant. When I asked my aunt how long it takes for the fondant to liquefy, she said "I don't know, they have never lasted that long!!" Oh family.
We had tons of things to dip! It was a great day, with 3 generations of Hoper girls learning a lost art.
We put everything out in the garage for the chocolate to set.
Now what to do with all those candies? Why give them away of course! We ended up making chocolate covered orange cremes, chocolate covered chocolate mint cremes, peppermint patties, chocolate covered caramels, peanut-cranberry clusters, divinity, and chocolate covered cherries. What a great day!
Cook sugar, butter and corn syrup until soft ball stage. Pour onto a buttered sheet pan to cool.
Once the sugar is cool enough to the touch, it needs to be worked....a lot. Through agitation and mixing of air, there is a chemical reaction where the sugar crystallizes from a gooey mess to an opaque, mold-able candy. You can feel it happening - it turns really hot all of a sudden - so an exothermic reaction.
Next, on to make those chocolate covered cherries. First you start with a mess of maraschino cherries.
Then you cover each cherry with some fondant. You have to make sure that you cover the whole cherry, to seal in the juices.
Let the fondant on the cherries dry - or lose the tackiness.
While we were waiting for the cherries to dry, we made peppermint patties with the other batch of fondant.
Once everything is dry, it's time to dip in chocolate! With the cherries, make sure you cover the stem up a good way to seal in all the juices.
A tray of finished cherries. So I was not aware that the cream the surrounds the cherry starts as fondant. When I asked my aunt how long it takes for the fondant to liquefy, she said "I don't know, they have never lasted that long!!" Oh family.
We had tons of things to dip! It was a great day, with 3 generations of Hoper girls learning a lost art.
We put everything out in the garage for the chocolate to set.
Now what to do with all those candies? Why give them away of course! We ended up making chocolate covered orange cremes, chocolate covered chocolate mint cremes, peppermint patties, chocolate covered caramels, peanut-cranberry clusters, divinity, and chocolate covered cherries. What a great day!
Saturday, December 14, 2013
Tonic Syrup
Sorry for the hiatus. Time has just gotten away from me. I still have been cooking and taking pictures! During this time, I was making Tonic Syrup. I decided to make this because I found my favorite drink to make with my limoncello is a mix of tonic, bitters and limoncello. Now I made the bitters and the limoncello, so all I needed to do was make tonic! I happened to come across this recipe a while back and squirreled it away for the future. Guess the future has come.
According to the recipe, I had most of the ingredients from making bitters. The main ingredient in bitters is cinchona bark, from Peru. It is a natural source of quinine - what is used to treat malaria. There's your factoid for the day. The lavender was a gift from my friend Lori. I did have to order citric acid from amazon. I couldn't find fresh lemongrass but had dried from my travels to Bali.
Basically take all the ingredients, put in a pan with water and boil. Cool, then put in a jar in the fridge for a week.
Strain out the solids. Put the strained liquid in another jar and put in fridge for a week.
Basically take all the ingredients, put in a pan with water and boil. Cool, then put in a jar in the fridge for a week.
Strain out the solids. Put the strained liquid in another jar and put in fridge for a week.
Then strain off liquid. There's a muddy brown sludge at the bottom of the jar, you don't want that. Then add rich syrup in equal measure to the liquid. Rich syrup is 2x sugar to water. You can use turbinado sugar to make your syrup or regular sugar. I used regular sugar.
I found that you can add a few ounces to a liter of sparkling water (I use a Soda Stream) and that's enough. Very tasty but not really like tonic. There are a lot of complex flavors going on and it ended up being too sweet when added to the limoncello. When making this again, if my goal was to add it to something sweet like limoncello, I would use only regular simple syrup not rich syrup. But that doesn't mean I can't find something to drink this with...I found that mixed with bourbon it was delightful.
Now, not to waste the citrus that I zested, I juiced them (with carrots):
That day, I also happened to be in a waste not, want not type of mood. So I found a recipe to use the pulp from the juicer. Will let you know what I did with that at a later date...
Sunday, November 24, 2013
Parmesan Honey Pork Roast
It has been a gross weather weekend. Last night I looked outside to see that the wind was blowing so hard, snow was flying sideways. I'm pretty sure the wind blew all night and has proceeded to blow all day today too. The wind blew so hard, it even blew in one of my window panes! Good thing there was a chair there or the glass would have broken! Makes me not want to go outside.
So I got out a pork roast from the freezer and looked through my recipes to find one I can make with what I had on hand. So I found a recipe I found on Pinterest called Slow Cooker Parmesan Honey Pork Roast.
1 (2-3 lb) pork roast
2/3 c grated parmesan cheese
1/2 c honey
3 T soy sauce
2 T Italian seasoning
2 T minced garlic
2 T olive oil
1/2 t salt
2 T corn starch
1/4 c water
Spray inside of crock pot with cooking spray. Put roast in crock pot. Combine parmesan, honey, soy, Italian seasoning, garlic, oil and salt in a bowl and pour over roast. Cook on low for 6-7 hours or until roast is 160 degrees. Take roast out of slow cooker, strain juices. Pour liquids into a sauce pan and bring to a boil. Mix corn starch and water in a jar and shake to make a slurry. Add slurry to boiling pan drippings and cook until thickened, about 2 min.
Very tasty - the soy added a nice dark color to the sauce. I even put the pork the in the slow cooker mostly frozen and it cooked up well. This is not the long cooking roast that you shred up with forks so it might not be the best recipe to do when you have to do to work for 8 hours. Looking forward to making some tasty sandwiches with that pork and gravy!! Nom nom nom.
So I got out a pork roast from the freezer and looked through my recipes to find one I can make with what I had on hand. So I found a recipe I found on Pinterest called Slow Cooker Parmesan Honey Pork Roast.
1 (2-3 lb) pork roast
2/3 c grated parmesan cheese
1/2 c honey
3 T soy sauce
2 T Italian seasoning
2 T minced garlic
2 T olive oil
1/2 t salt
2 T corn starch
1/4 c water
Spray inside of crock pot with cooking spray. Put roast in crock pot. Combine parmesan, honey, soy, Italian seasoning, garlic, oil and salt in a bowl and pour over roast. Cook on low for 6-7 hours or until roast is 160 degrees. Take roast out of slow cooker, strain juices. Pour liquids into a sauce pan and bring to a boil. Mix corn starch and water in a jar and shake to make a slurry. Add slurry to boiling pan drippings and cook until thickened, about 2 min.
Very tasty - the soy added a nice dark color to the sauce. I even put the pork the in the slow cooker mostly frozen and it cooked up well. This is not the long cooking roast that you shred up with forks so it might not be the best recipe to do when you have to do to work for 8 hours. Looking forward to making some tasty sandwiches with that pork and gravy!! Nom nom nom.
Saturday, November 23, 2013
Finally settling in
It's taken a while, as it always does when you move, to finally feel like you are settling in.
This is a shelf I put in the kitchen to hold my kitchen nick nacks. In my old place, most of this stuff went above the cabinets.
But as you can see I don't have space above my cabinets. So I hung pictures on the wall anyway.
More pictures on the walls. And yes, that is a sewing machine table in my TV room...I'm hoping this will stimulate me to finish that last quilt!
This is my front room, notice the cats! A big thank you to my friend Patty and her husband, Tim for helping put all of the pictures up. Tim was a trooper!!!
Monday, November 11, 2013
Vegan Cheese?
You know how you hear about something and you can't stop thinking about it? It was that way when I was listening to the Alton Browncast. He was interviewing Bob Taylor, a guy that makes guitars (really look at this marble cake ebony) and has recently become a vegan. That lead to talking about finding a substitute for cheese and he started talking about how he made "cheese" with cashews. Now I LOVE my cheese and have recently been thinking that due to this love, I have been eating way too much of it lately. So if this was any good, it might be a good substitute.
After some internet research, I found that to make the "cheese" you first need to start with making something called rejuvelac. This is a fermented liquid that comes from sprouted grains. You can use quinoa, rye or wheat. Apparently the quinoa version takes the least amount of time because the grain itsself is smaller. You first wash the grain until it starts to sprout then you let it sit and ferment for a day or so until it's cloudy. You drain off the liquid and can make a second batch.
Soaking the grain.
Look, it sprouted!
Finished product.
Once you have this fermented liquid, then you make the "cheese". I found this recipe for roasted garlic and sundried tomato vegan cheese. It sounded great and even if there were off flavors, that would be covered up by the deliciousness.
First cover raw cashews with water and soak for 12ish hours.
Drain and rinse nuts, see how they have softened and plumped?
Put in a blender or food processor and add your fermented liquid. The recipe called for a measily 1/2 cup, but I found that I needed a full cup for the nuts to blend smoothly.
Then put puree in a cheesecloth lined sieve and let sit overnight.
In the morning, squeeze roasted garlic into a bowl (get recipe here).
Add chopped sundried tomatoes.
Here's what the "cheese" looks like after it has drained overnight.
Now, all mixed together with added yumminess. Then put in fridge for 12-24 hours.
After being in the fridge, the "cheese" has firmed up.
But it's still pretty spreadable. Overall pretty tasty - doesn't taste like cashews but doesn't taste like cheese either. It would be nice for the holidays as part of an appetizer plate, but I don't know if I would continue to call it cheese. Looks like there a lot of recipes out there to make different "cheeses", including more aged cheese that is firmer. I might keep experimenting, more to come...
After some internet research, I found that to make the "cheese" you first need to start with making something called rejuvelac. This is a fermented liquid that comes from sprouted grains. You can use quinoa, rye or wheat. Apparently the quinoa version takes the least amount of time because the grain itsself is smaller. You first wash the grain until it starts to sprout then you let it sit and ferment for a day or so until it's cloudy. You drain off the liquid and can make a second batch.
Soaking the grain.
Look, it sprouted!
Finished product.
Once you have this fermented liquid, then you make the "cheese". I found this recipe for roasted garlic and sundried tomato vegan cheese. It sounded great and even if there were off flavors, that would be covered up by the deliciousness.
First cover raw cashews with water and soak for 12ish hours.
Drain and rinse nuts, see how they have softened and plumped?
Put in a blender or food processor and add your fermented liquid. The recipe called for a measily 1/2 cup, but I found that I needed a full cup for the nuts to blend smoothly.
Then put puree in a cheesecloth lined sieve and let sit overnight.
In the morning, squeeze roasted garlic into a bowl (get recipe here).
Add chopped sundried tomatoes.
Here's what the "cheese" looks like after it has drained overnight.
Now, all mixed together with added yumminess. Then put in fridge for 12-24 hours.
After being in the fridge, the "cheese" has firmed up.
But it's still pretty spreadable. Overall pretty tasty - doesn't taste like cashews but doesn't taste like cheese either. It would be nice for the holidays as part of an appetizer plate, but I don't know if I would continue to call it cheese. Looks like there a lot of recipes out there to make different "cheeses", including more aged cheese that is firmer. I might keep experimenting, more to come...
Subscribe to:
Posts (Atom)